There is one problem with model building that you have come across before, guaranteed. It occurs with every software, on any machine with 99% of the models you build. It might seem so inescapable that you never even thought about it in the first place. It is called “screen real estate”.
If you live in London or New York, you know that space is valuable. The same is true for your monitor screen. With a modelling tool like AnyLogic, it cannot be large enough. During AnyLogic trainings, I always recommend people to buy an external monitor (do it, your efficiency will shoot up even if your current monitor is very large!). However, it only helps to some extent. As soon as you drag a few objects into your model, you run out of space.
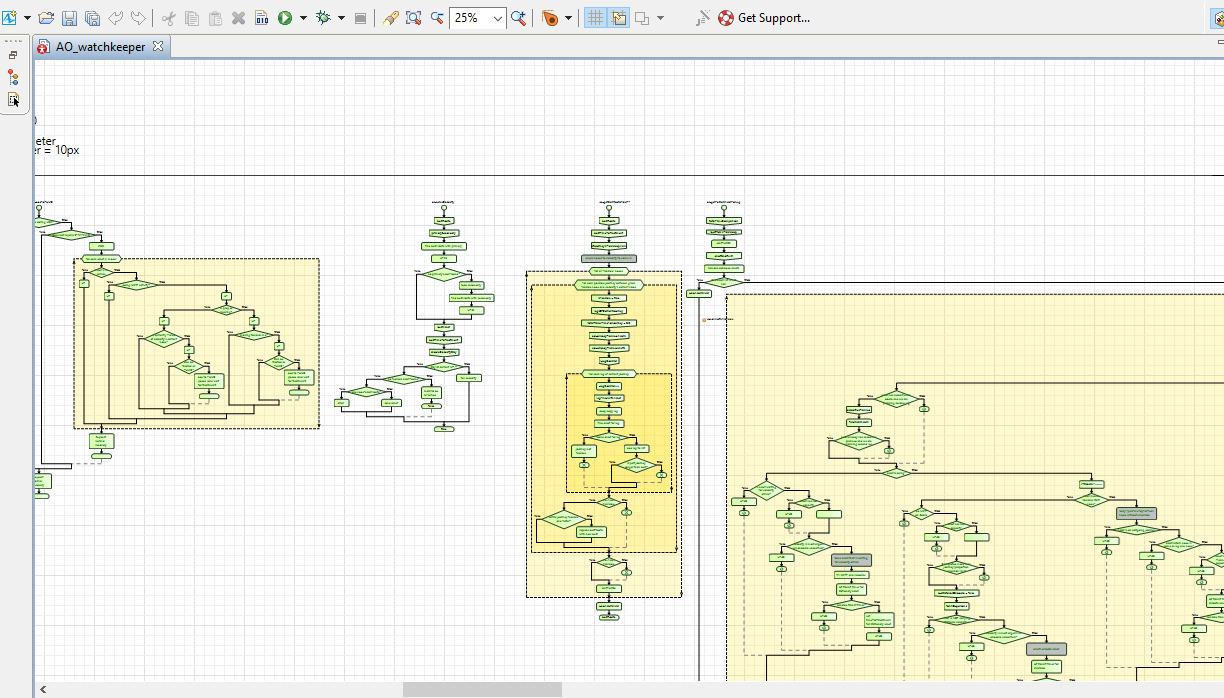
So what do you do? Wise men in ancient times invented mouse panning. So you pan. And pan. Sometimes you pan some more. Look at this recent model I helped to build. We panned a lot.There is one problem with model building that you have come across before, guaranteed. It occurs with every software, on any machine with 99% of the models you build. It might seem so inescapable that you never even thought about it in the first place. It is called “screen real estate”.
Big models need lots of panning
Are you in a panning crisis, too? The more I write these blogs, the more I realize that AnyLogic is full of little magic helpers that people are not aware off or forgot. This week, we will look at yet another one: the view area object (check my posts on the magic lightbulb for yet another).
What does it do?
You might be OK with lots of panning during development. But what about your client? Usually, he wants to jump to important areas of your model with just one click (check my post on a model navigation ribbon bar for more help on this).
The view area object helps you jump to set areas of your model directly. This can be within the same model object (from one corner of “Main” to another) but also to different agents or even the experiment setup page. Let’s have a closer look.
How to set it up
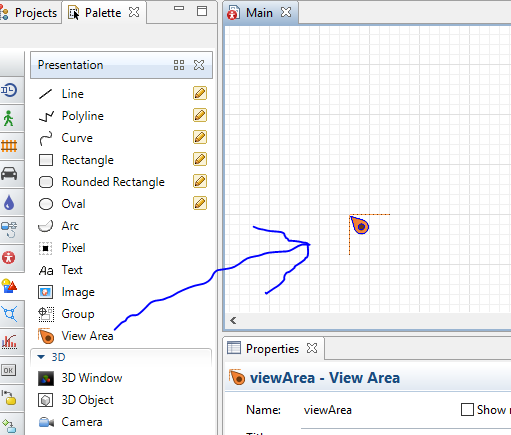
You can find our little friend in the “Presentation” library, conveniently named the “View Area” object. Drag it into your model somewhere and you are ready to go. Wherever you drag it, this is what the client will be taken to when using the view area.
Find the "View Area" object in the Presentation library
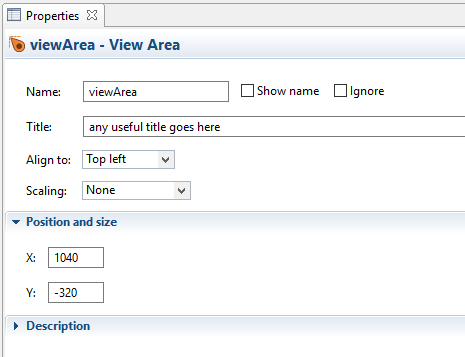
The properties of your new precious are simple enough so let’s go through them in detail.
The “Title” property is a text field accepting any string. Note that it is not a Java code field so you cannot write code here. Instead, you can provide a useful hint for your clients of where this view area will take them. We will see more on that below.
The “Align to” field defines which part around the view area will be displayed. The default setting “Top left” means that you will see what is below and right of the view area object. Here, you can fine-tune what the client should see, independent of her screen resolution or monitor. If you want to ensure they see a core statistic, you’d drag your view area right into the middle of it and align it to “Center”.
The “Scaling” property allows you to zoom in and out of the model while jumping to your view area by using the “Specified zoom” option. So you could have 2 view areas close to each other. One shows “All stats” and is zoomed out a lot. The other shows “Statistic XYZ” and is just zooming into that specific statistic. Note that you can also define a fitting area if you select “Zoom to fit” and its related options. Thereby, you can explicitly specify which area should be visible.
How to use it
In order to appreciate the different options, I recommend you play around with them. There are different ways to actually use your view areas.
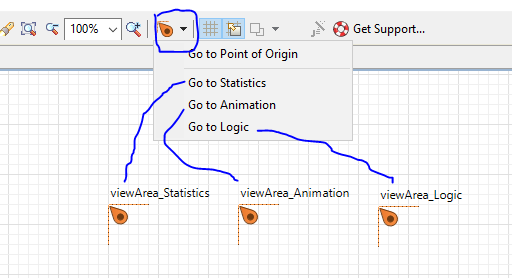
AnyLogic provides a build-in method to use your view areas. During building your models, have you ever noted the shy little button shown below?
Navigate to view areas during design time
It lists all view areas you defined in your current agent. Click on one and you will be taken to that view area. Note that it lists them not by their Java object name (“viewArea_Statistics” in my example) but by what you specify in the “Title” property.
The second build-in support is identical but appears during running the model:
Note that with both methods, you do not see all view areas defined in your model. You are only given the choice of those view areas that are part of the current agent class you are looking it. If you are in “Main” and want to see details of an embedded agent “Car”, you need to go to that agent class first. During runtime, you can use the drop-down list left of the view area button to do that. Thereby, you and clients have a powerful way to navigate the model without much development work needed.
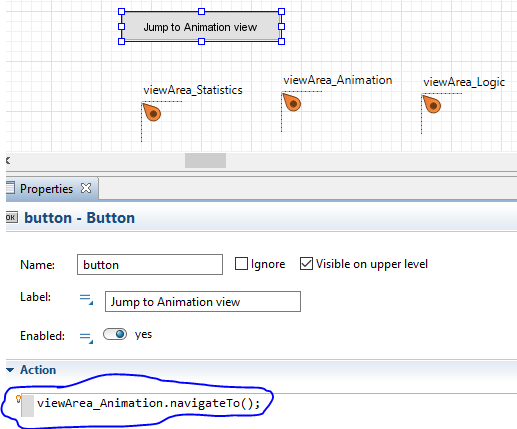
The third option allows you go beyond that limitation. Instead of using the build-in support, you can call the “navigateTo()” method on your view area objects as below.
In this example, clicking the button will force the model to jump to the animation view area. If you want to jump to another agent in your model, you need to use the object-oriented framework of AnyLogic and Java, i.e. something like
which will take you to the 13th agent from the myAgentPopulation population on Main (Java is zero-based).
Bonus hint
Blog reader Justin Rawlings previously pointed out that there is another useful feature: If you have the 'create view area in origin' option ticked on your agent class properties, Anylogic creates a view area called “origin_VA” for you. The “origin_VA.navigateTo();” method will work the same whether the agent is in a population or not. It's also helpful for models where the 'Main' agent is in a different .alp file such that your agents don't have a direct handle to to it. Thanks, Justin :-)
Conclusion
Tired of panning? Fed up with zooming out and back in? Want to provide a professional interface for model users? The view area object in AnyLogic is a useful little helper for that. Build-in support allows you to jump around any part of your model. You can also apply a bit of coding and access the full power of the view area. Make your client happy and give your mouse a break.